pink and green 3d simple to draw art
Cartoon a model in 3D is different from drawing an prototype in 2D. This introduction to drawing basics and concepts explains a few ways you can create edges and faces (the basic entities of any SketchUp model). Y'all also find how the SketchUp inference engine helps you lot identify those lines and faces on your desired axis.
Table of Contents
- Drawing a line
- Creating a face up
- Dividing faces
- Opening 3D shapes by erasing edges
- Healing deleted faces
- Knowing your inference types
- Finding and locking an inference
- Linear Inferencing Toggle
- Locking inferences with the keyboard
- Ensuring edges are aligned to axes
Drawing a line
Use the Line tool to describe edges (also called line entities). Edges form the structural foundation of all models. Here's how to draw a line:
- Select the Line tool (
 ) on the toolbar (or printing the L key). The cursor changes to a pencil.
 - Click to set the starting point of your line. If you click the incorrect identify, printing the Esc primal to start over. As y'all move your cursor effectually the drawing expanse, detect the post-obit:
- A line follows your cursor.
- The line length is displayed dynamically in the Measurements box. (The Measurements box uses the units specified in your template.)
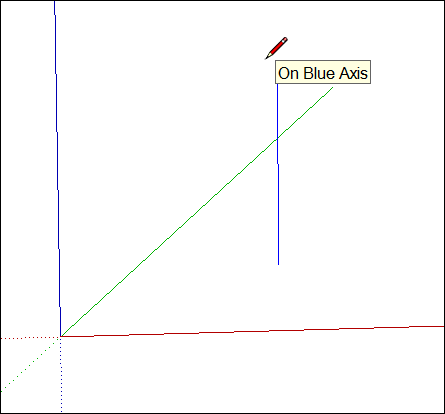
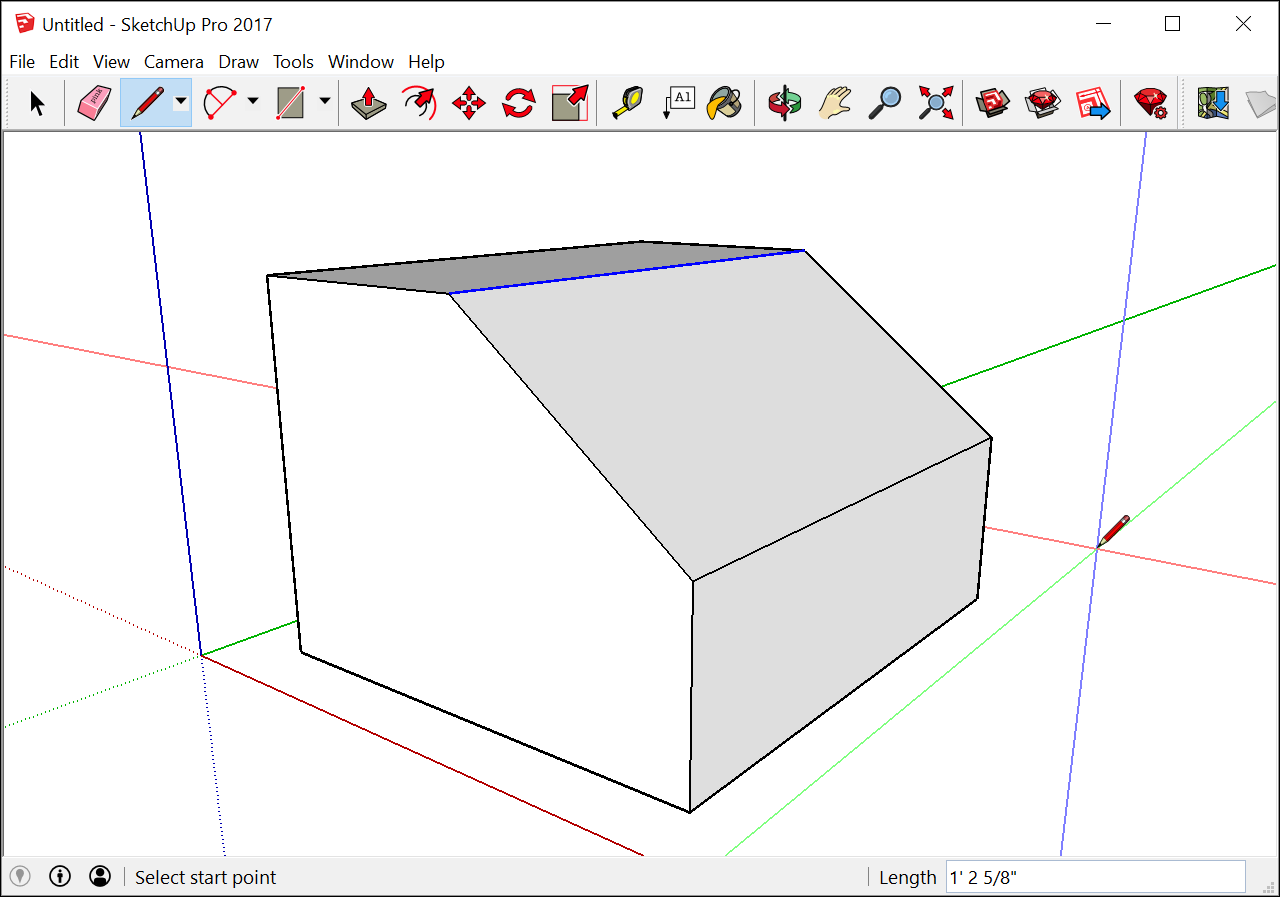
- The line that's following your cursor turns red, light-green, or bluish whenever the line is parallel with the blood-red, greenish, or blue axis, respectively. If you hover for a moment, a ScreenTip appears, like the On Blue Centrality tip shown in the figure. There is no ghost in your machine; that'south the SketchUp inference engine, which you acquire more almost later in this commodity.
- Click to set the line's end betoken. This end point can as well exist the starting point of another line. Press Esc or select a different tool when you lot're done drawing lines. Later on you prepare the end signal, you tin printing Ctrl+Z (Microsoft Windows) or Command+Z (macOS) to undo your line and kickoff over.
- (Optional) To make your line a precise length, type a value and printing Enter (Microsoft Windows) or Render (macOS). You can repeat this procedure equally many times as you like until you describe a new line or select another tool. If you don't specify a unit, SketchUp uses the unit specified in your template. Notwithstanding, you can type any imperial or metric unit for your line. So you tin can type 3mm or 5'2" for example. Your value appears in the Measurements box as you type.
Notation: The Measurements box also accepts 3D coordinates for lines:
- An accented coordinate, such as [iii', 5', 7'], places the cease of the line relative to the current axes. Square brackets signal an absolute coordinate.
- A relative coordinate, such as <1.5m, 4m, 2.75m>, places the end of the line relative to the starting point of your line. Angle brackets indicate a relative coordinate.
You lot can edit the length of a line every bit long as it doesn't leap a face. Hither's how to edit a line:
- Select the Motion tool (
 ).
). - Hover the Movement tool cursor over one of the line'south end points.
- Click and elevate the terminate point to change the line's length.
Tip: You can also adjust the length in the Entity Info dialog box. Context-click the line, and choose Entity Info from the menu that appears. In the Length box, type a new line length.
Creating a face
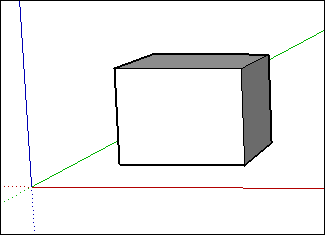
When you lot join several lines into a shape, they form a face up.
Non a funny face, or a scary clown face, or even a cute puppy face. Past default, faces are plain, but super important: They're the other half of the duo, edges and faces, which enable every SketchUp model ever made to exist.
Tip: Past default, SketchUp adds shading to some faces, as shown here, and the faces are opaque, so you know your model has an bodily wall, floor, or whatever your face is supposed to represent in your 3D model. (Even so, SketchUp does include a view that enables y'all to come across through walls, just like Superman. See Viewing a Model for details.)
The shape tools — Rectangle, Circle, and Polygon — likewise create faces. (Encounter Drawing Basic Shapes for more almost those tools.)
Dividing faces
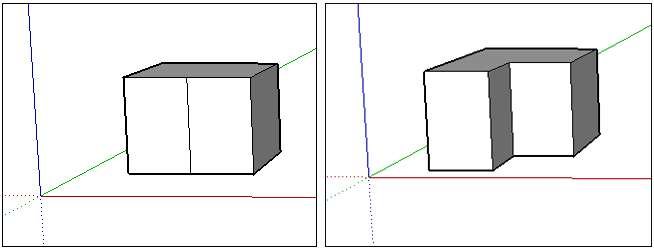
When y'all describe a line (or a curve) on an existing face up, you carve up the face up.
Tip: This concept is of import because, after you split up a face, y'all can use the Push/Pull tool to push or pull one office of the face while the other office stays put, as shown hither. See Pushing and Pulling Shapes into 3D for details about the Push/Pull tool.
Opening 3D shapes by erasing edges and faces
You can erase an edge or face to create an opening in a shape. To encounter how erasing an edge affects your model, first select the Eraser tool ( ) in the toolbar or press the E fundamental, and then click an edge:
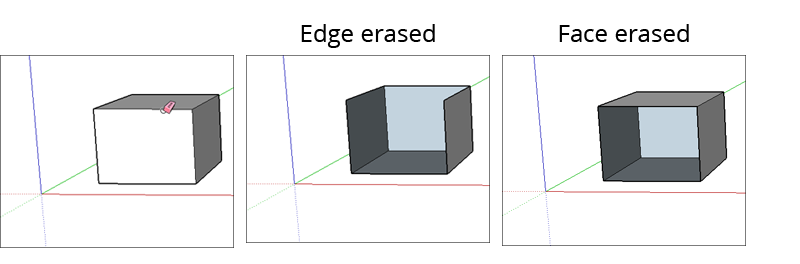
- Clicking an border erases the border and whatsoever face that touched that edge. Equally Billy Idol nearly sang, you tin have lines without a face. However, a face must exist completely bound by edges.
- Context-clicking a face and choosing Erase deletes only the face.
In the effigy, you lot see the original cube and how erasing an edge or face up changes the cube.
Tip: If y'all want to hide a line instead of erasing it, agree downward the Shift key as you click the line with the Eraser. Or context-click the line and select Hide.
Healing deleted faces
If you accidentally delete a confront, here's how to bring information technology dorsum:
- If you haven't made whatsoever other changes that you lot'd like to go along, simply select Edit > Undo from the menu bar. Or press the keyboard shortcut for Undo, Ctrl+Z (Microsoft Windows) or Control+Z (macOS).
- Redraw the line that caused the faces to disappear, and SketchUp volition re-create the faces.
Knowing your inference types
SketchUp displays several types of inferences: point, linear, and shape. SketchUp oft combines inferences together to form a complex inference. Also, components and dynamic components take their own inference types.
A point inference is based on the exact indicate of your cursor in your model. The post-obit tabular array lists the indicate inference types.
| Indicate Inference Type | What Information technology Looks Like | What Information technology Means |
|---|---|---|
| Origin betoken | 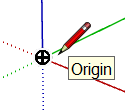 | The bespeak at the intersection of the three drawing axes |
| Component Origin Point | 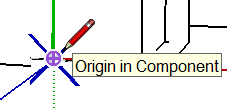 | The centrality origin point within a group or component and the group or component's default insertion signal |
| Endpoint | 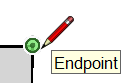 | End of a line, arc, or arc segment |
| Midpoint | 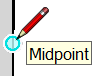 | Centre bespeak on a line, edge, or arc segment |
| Arc Midpoint | 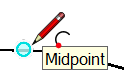 | Centre point on an arc |
| Intersection | 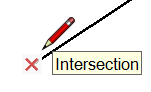 | Indicate where a line intersects another line or confront |
| On Face | 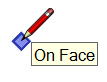 | A signal that lies on a face |
| On Edge | 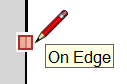 | A betoken that lies on an edge |
| Heart |  | Heart of a circumvolve, arc, or polygon |
| Guide Betoken |  | A guide point |
| On Line |  | A point along a guide line |
| On Section |  | Point where a cartoon tool creates an edge on a department plane |
| Intersection with Subconscious Section |  | Bespeak where an border that is generated past a hidden section plane intersects with the drawing tool |
Notation: All these betoken inference types are magenta in color when the geometry is within a group or component.
A linear inference snaps along a line or direction in space. In addition to a ScreenTip, a linear inference sometimes displays a temporary dotted line while you describe.
| Linear Inference Type | What It Looks Like | What It Means |
|---|---|---|
| On Red Axis | 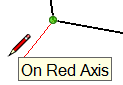 | Linear alignment to the red drawing centrality (Click and drag equally you describe to see the inference.) |
| On Green Axis | 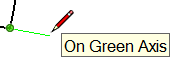 | Linear alignment to green drawing axis (Click and elevate equally y'all draw.) |
| On Blue Axis | 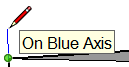 | Linear alignment to the blueish cartoon axis (Click and elevate as you draw.) |
| From Point | 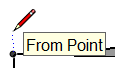 | Linear alignment from a point; the dotted line's color corresponds to the axis direction |
| Through Point | 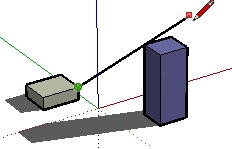 | Describe from one point, hover over some other betoken and so agree Shift to lock the direction from the start of the drawing through the second point. |
| Parallel | 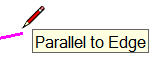 | Parallel alignment to an edge |
| Extend Edge |  | Continuation of an existing edge |
| Perpendicular | 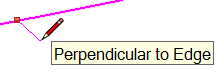 | Perpendicular alignment to an border |
| Perpendicular to Face | 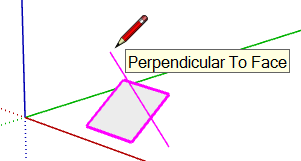 | Perpendicular alignment to a face up |
| Tangent at Vertex | 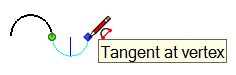 | Arc whose vertex is tangent to a previously drawn arc'southward vertex |
Shape inferences help y'all pinpoint the moment when a rectangle becomes a foursquare, for example. The following table lists all the shape inferences.
Tip: If your cartoon needs to follow specific proportions, shape inferences are a huge assist, considering shapes in 3D perspective don't expect the same every bit they practise in 2nd.
| Shape Inference Type | What Information technology Looks Similar | What It Means |
|---|---|---|
| Square |  | A rectangle whose sides are all the aforementioned size |
| Gilt Department | 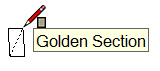 | A rectangle whose properties match the Aureate Ratio every bit found in mathematics and the arts |
| Half Circle, Quarter Circle, or Three-Quarter Circle | 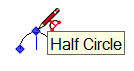 | An arc that is exactly 1 half of a circle, ane quarter circle, or three-quarters of a circle, respectively. |
| Arc Side and Center | 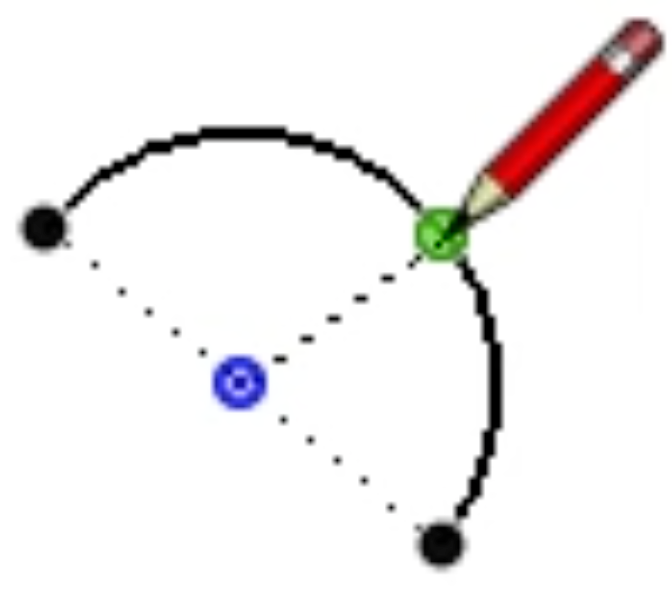 | An arc shows border and center inferences when a drawing tool hovers on the arc. |
| Circumvolve/Polygon Middle | 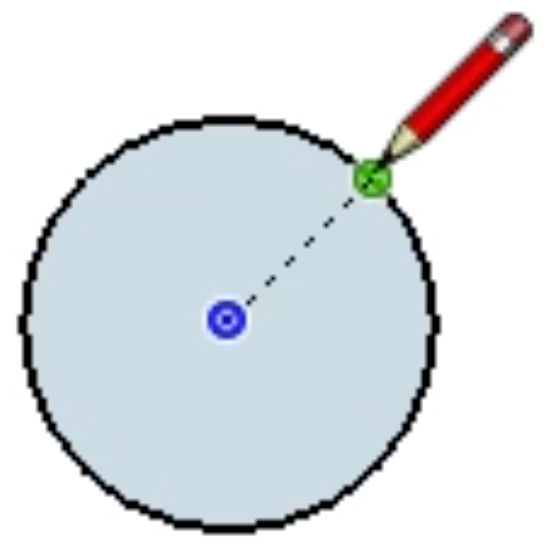 | A circle shows and center inferences when a drawing tool hovers on the circle edge. |
Note: All inferences use to geometry inside component entities or group entities. Group and component inference indicators are the same shape, simply are magenta color. Grouping and component ScreenTips also betoken that the inference is in a group or component entity by appending the phrase "in grouping" or "in component" to the end of an inference ScreenTip. See Adding Premade Components and Dynamic Components for data well-nigh components.
Finding and locking an inference
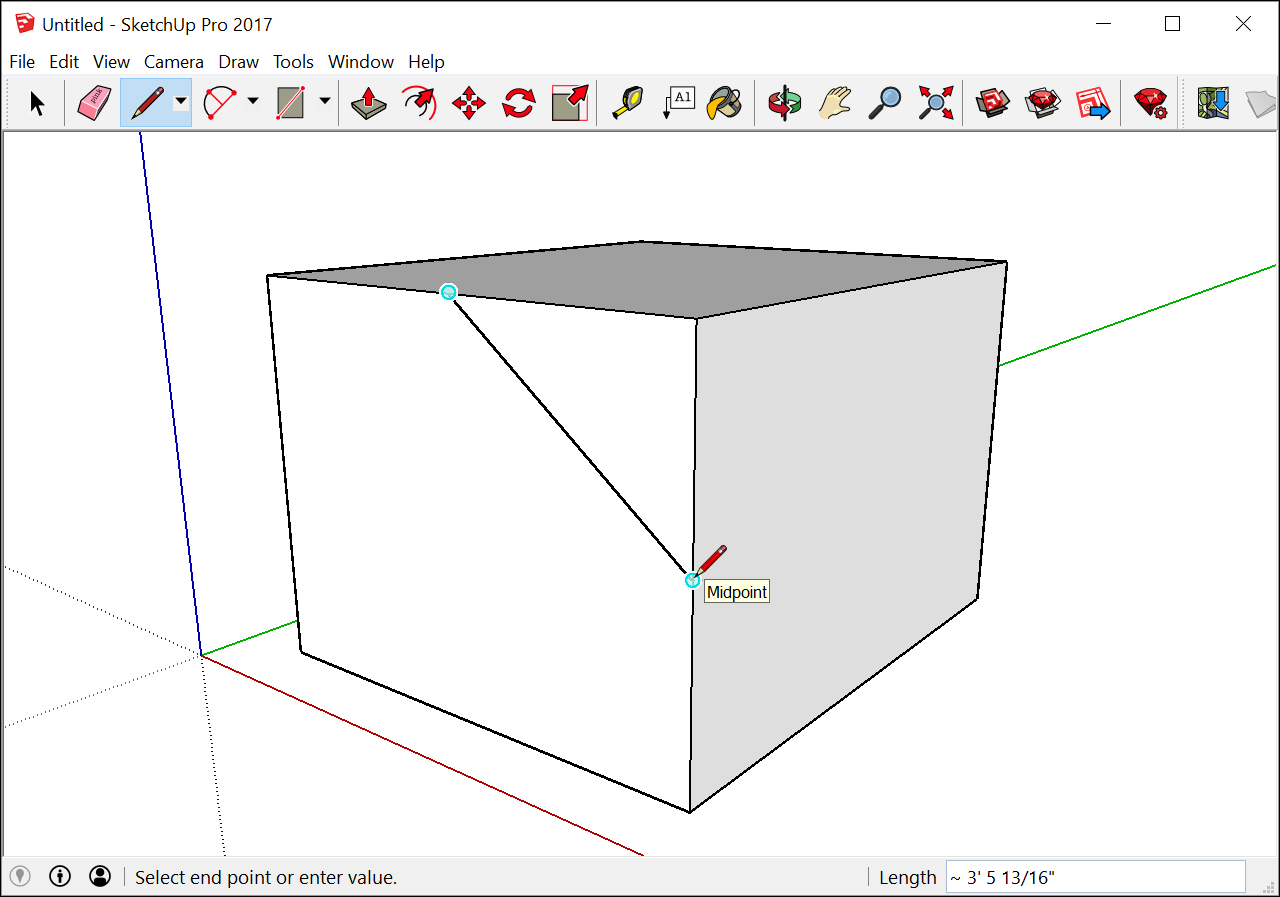
SketchUp has an inference engine that helps y'all piece of work in 3D space. For instance, when the Line tool cursor is hovering over the midpoint of another line, the inference engine tells y'all by displaying a lite blue dot and ScreenTip that says, "Midpoint," as shown here. Every inference has its own color and ScreenTip. (Come across Knowing your inference types for a full list.)
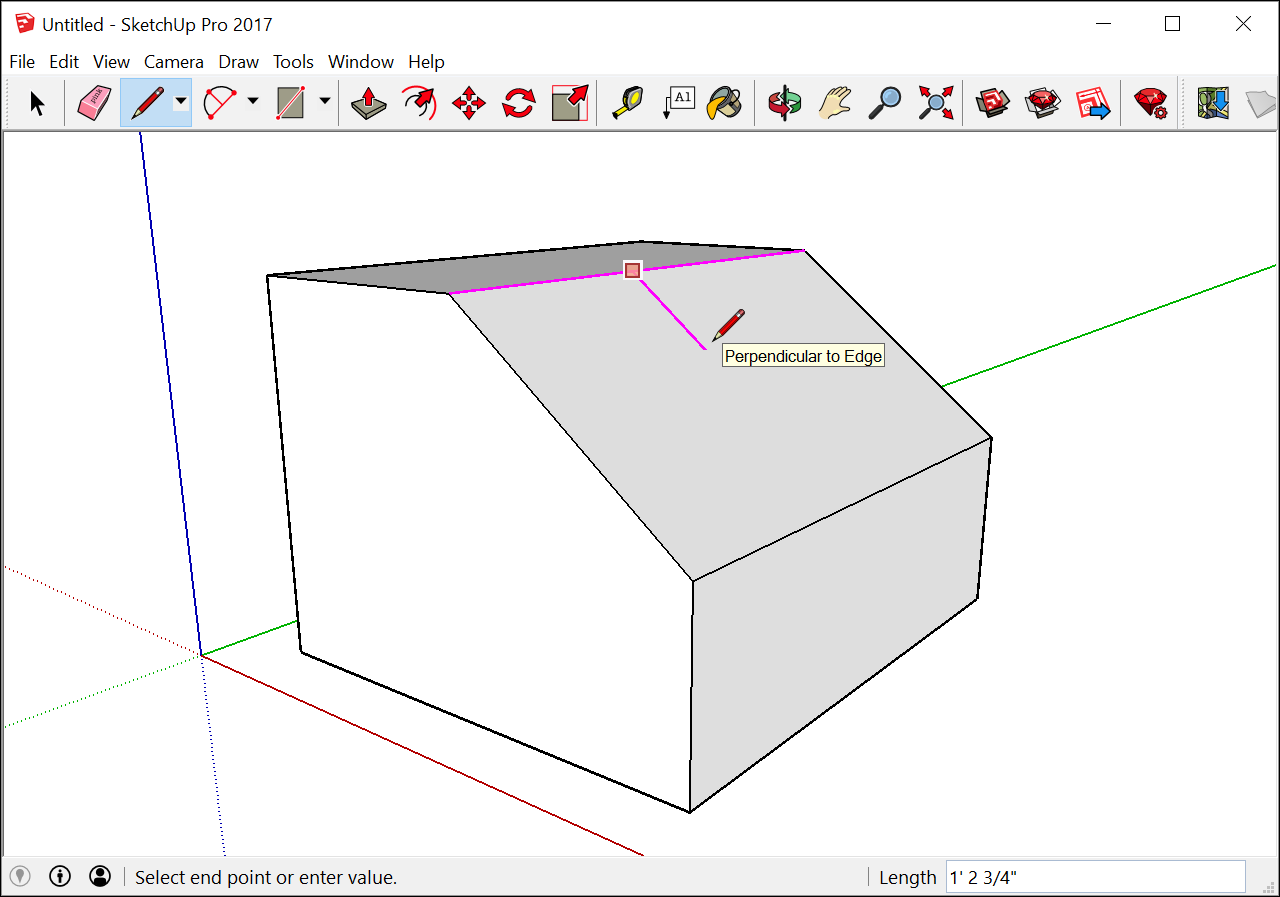
The inference engine can as well aid yous discover geometric relationships between lines. For example, it tells you lot when a line y'all're drawing is perpendicular to another line. In the following figure, notice that a colored dot also appears at the start point of the line, giving you a few bits of information all at one time.
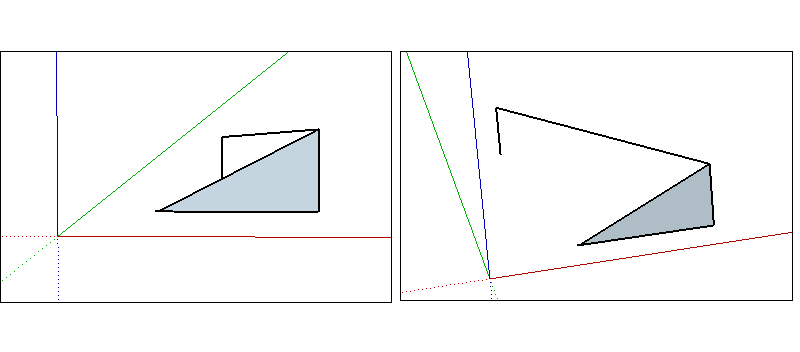
Warning: Pay close attending to the inference engine and orbit occasionally to check your drawing from different viewpoints. In the following figure, the lines might appear to exist on the red and dark-green plane until you orbit to a different view. To avert this common pitfall, SketchUp helps by turning your drawing direction or drawing plane cherry, greenish, or blue when y'all're creating edges or planes parallel to those axes (or magenta if you're parallel/perpendicular to an border or face in your model).
Tip: At times, the inference you need may not come up upward immediately or SketchUp might cull alignments with the incorrect geometry. In these cases, you can encourage an inference, or increase the chances of a particular alignment past pausing your mouse cursor over the location that you desire SketchUp to infer from. When the visual cue appears, SketchUp will briefly prioritize that alignment equally you continue drawing.
Linear Inferencing Toggle
Inferencing is a fundamental feature of SketchUp with most tools depending on it in some manner.. However, inferencing can sometimes get in your way, especially when working in a busy surface area of a model. With the Line tool, you tin can turn linear inferencing off and dorsum on using a uncomplicated modifier action.
To toggle linear inferencing in the Line tool, yous'll need to click one time to starting time drawing your line. One time you've started your line, only earlier clicking to cease it, simply press the Command key on the Mac or ALT key on Windows which volition toggle through the following states:
- All Inferences On
- All Inferences Off
- Parallel and Perpendicular Only
All Inferences On
This is the default beliefs and what you've experienced in SketchUp since Version 1. The Line tool will snap to the red, greenish, and blue axes, as well as the magenta axis (parallel/perpendicular to a specified edge.)
All Inferences Off
In this state, the Line tool volition ignore all linear inferences. Notice that your cursor will movement more freely around the screen equally you lot complete edge segments. Note that you can nonetheless find other inference types such every bit On face, Guide points, Midpoints, and more than.. Utilize these other inference types to brand sure your lines are drawn on the planes you want.
Parallel and Perpendicular Only
This state shows only parallel and perpendicular linear inferences when using the Line tool. Selecting this pick will permit you to depict your line, making certain it is parallel or perpendicular to other geometry, while non getting distracted past other linear inferences that might be tempted to steal your line.
Locking inferences with a keyboard
By locking inferences, you can confidently describe along the management you intend to draw. Some other reason to lock an inference is to maintain one drawing management while yous reference geometry from another part of the model. That's a more advanced motion, but very helpful. The easiest way to lock an inference to the default axes directions is to employ the arrow keys. Annotation that y'all'll see a notification at the cursor that the inference is locked.
| Key | What information technology looks like |
|---|---|
| ↑ | Locks the drawing management or drawing plane to the Blue axis |
| ← | Locks the drawing direction or drawing plane to the Green axis |
| → | Locks the drawing direction or cartoon aeroplane to the Red axis. A skilful way to remember left from right is to say "Right locks Carmine." |
| ↓ | Toggle to lock the parallel/perpendicular drawing direction or drawing airplane to an inferenced edge or plane. Basically, anything that turns magenta. The drawing management will plough magenta in colour also as the edge of face that is existence inference. |
| Shift | Locks the drawing direction or drawing airplane to the active drawing direction/airplane. Then if you're drawing along the Blueish axes and agree down Shift, the Blue inference volition lock. |
| Shift+Alt (Windows) or Shift + Command (MacOS) | Belongings shift to lock the drawing plane also locks the tool to the same face airplane that is inferenced. For the Rotate and Protractor tools, however, press the Alt cardinal (Microsoft Windows) or Command key (MacOS) to free those tools and then that yous can movement the center to another place in the model while maintaining the same cartoon plane |
Some tools, like the circle and rotate tools, can lock to a plane (instead of a cartoon direction) as shown below. For these tools you can lock the drawing plane by choosing the colored direction for the tool's axis or "normal".
Ensuring edges are aligned to axes
To ensure your edges marshal to axes, you may detect it helpful to alter the cursor to the axes colors. Or if you demand to check the alignment of existing geometry, change your edges to the axes colors.
To alter your cursor to axes colors, follow these steps:
- Select Window > Preferences (Microsoft Windows) or SketchUp > Preferences (macOS). The SketchUp Preferences" dialog box appears.
- Select the Cartoon item on the left.
- In the Miscellaneous surface area of the Drawing panel, select the Brandish cross hairs checkbox.
- Click OK to shut the SketchUp Preferences dialog box. The cursor displays cantankerous hairs that are the color of the axes, as shown here.
To make the edges in your model reflect the centrality color to which it is aligned, follow these steps:
- Select Window > Styles.
- In the Styles dialog box, select In Model from the drop-down list of styles libraries.
- Click the Edit tab.
- Click the Edge Settings icon, shown in the effigy.
- From the Color drop-downwards list, select By axis. The colors of the edges in your model alter to reverberate their alignment to the axes (unless an edge isn't aligned to an axis, and then the edge colour does not change). The post-obit effigy shows which edges are (and are not) aligned to the three axes.

Source: https://help.sketchup.com/en/sketchup/introducing-drawing-basics-and-concepts
0 Response to "pink and green 3d simple to draw art"
Post a Comment